Yesterday I posted about having a very full SCA schedule for June... and that the summer will be very full of work on a project for September... however, I am also currently working on a post 1600 item.
My current travel piece is this little bit of knitting:
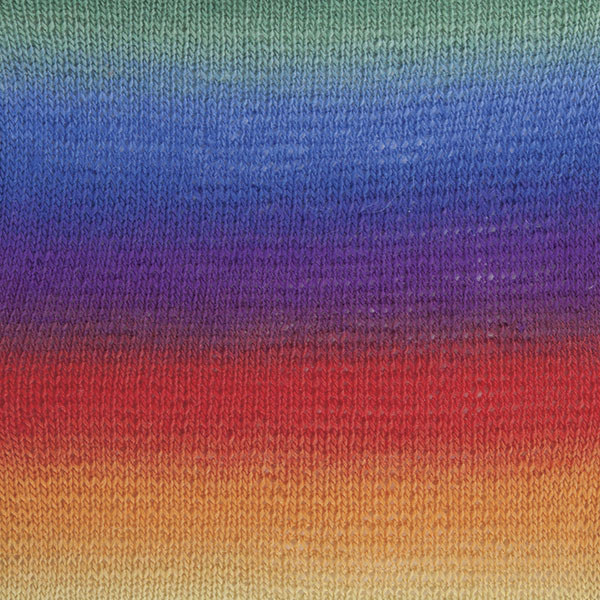
It's KnitPicks' pattern Northern Lights cowl, though I've adjusted the stitch count to make tracking the rounds a little less important -- by using one stitch less it's a simple pattern of five knit, one perl. The yarn is their Chroma in the color "Carnival." It fills my heart with glee to see all the lovely jewel tones, and it has plenty of the "color that makes me smile." The yellow and green stripes are wider because it is a mirror repeat. I'm looking forward to seeing how it all comes together.
My yellow alpaca wrap is waiting for the work table in my studio to be clear so it can be blocked.
Once the cowl is done I'll be casting on some fingerless mitts in the same yellow alpaca -- though I need to choose a pattern first.
I like knitting -- especially these smaller type of projects -- for my travel projects because they easily fit in my purse and can come out and a bit done any down time.
Enjoy the rest of the week folks!
Showing posts with label Modern. Show all posts
Tuesday, May 17, 2016
Wednesday, May 11, 2016
Tuesday on Wednesday
Tuesday is the day for post 1600 through modern stuff -- so what better day to gloat report about the goodies I got at Maryland Sheep & Wool.
First, to brag on my husband, who took second place in the grand lamb cookoff with his home made lambwich -- using his own sauce. Second place for the second year in a row. This year with 95 (of 100) points. He is, of course, already planning next year's entry. I will be subjected to the testing. "Darn.
Now, on to the loot. There it all is (except for items purchased for gifts, because this is a spoiler free zone).
Let's see, silk threads, scissors, a posy pin and a tote. Nope, no yarn. Oh, I saw lots of yarn that I could have bought, but every time I started to look at some, I remembered that my cedar chest (repository of my stash) is full -- and that I have yarn that doesn't fit.
The base there is a tote bag with a prior year's design. It's a great middle size, and recycled materials. I was using the backpack style bag I got at NY S&W, so didn't really need a new tote bag, but it really just kind of called out. Now I have a tote from every S&W I've been to.

Those scissors are really unique. The handle rises from the pivot point at an almost 90 degree angle, then the finger rings bend off again. This allows for trimming of embroidery thread ends right next to the ground fabric, without distorting the ground fabric. I'm looking forward to using these to make nice close trims of my ends on embroidery.
Two of the vendors were familiar to me from New York S&W.
The Wool Room has a supply of Japanese filament silk. The lovely lady went to her car and got the tote out for me, and my friend and I had a grand time rooting through. I was able to add black and this lovely burgundy to my collection of this super, super fine silk thread. That is one strand of the burgundy sitting on that dime. You can tell by looking at the hanks that it is really as fine as hair. It's fussy to work with, but makes a lovely couching thread.
The other vendor is Serendipity Farm & Studio. Like The Wool Room, they primarily carry weaving supplies. They do have one rack of these spools of silk thread. I'm pretty sure I have both this gold and this green, and there's lots on there, but I also could not resist picking up another spool. I have their white and a lighter gold and a greenish gold. This is a fairly tightly twisted thread, and I have found it to be very useful for sewing.
A not so-fiber-related item that I bought was this posy pin. I've been watching Poirot on Netflicks, and love the pin he wears that holds a flower. So, when at one stall I found these posy pins made from old hollow handled table knives, I had to get one. Here it is with a bit of my (not yet open) lilac in it. I was even able to choose one from a flatware design similar to some of the silverware I grew up with.
The last goodie was food. One of the highlights of NY S&W is the fried artichoke hearts -- Artichoke French. Well, he was at Maryland S&W. By the time we went the line wasn't *too* bad -- I think we only waited about 20 minutes to get to the front, but so worth it.
Now, on to the loot. There it all is (except for items purchased for gifts, because this is a spoiler free zone). Let's see, silk threads, scissors, a posy pin and a tote. Nope, no yarn. Oh, I saw lots of yarn that I could have bought, but every time I started to look at some, I remembered that my cedar chest (repository of my stash) is full -- and that I have yarn that doesn't fit.
The base there is a tote bag with a prior year's design. It's a great middle size, and recycled materials. I was using the backpack style bag I got at NY S&W, so didn't really need a new tote bag, but it really just kind of called out. Now I have a tote from every S&W I've been to.

Those scissors are really unique. The handle rises from the pivot point at an almost 90 degree angle, then the finger rings bend off again. This allows for trimming of embroidery thread ends right next to the ground fabric, without distorting the ground fabric. I'm looking forward to using these to make nice close trims of my ends on embroidery.Two of the vendors were familiar to me from New York S&W.
The Wool Room has a supply of Japanese filament silk. The lovely lady went to her car and got the tote out for me, and my friend and I had a grand time rooting through. I was able to add black and this lovely burgundy to my collection of this super, super fine silk thread. That is one strand of the burgundy sitting on that dime. You can tell by looking at the hanks that it is really as fine as hair. It's fussy to work with, but makes a lovely couching thread.
You can see from the single thread sitting on a dime that this is a good sewing size. It will also be a good thread for couching larger cords.
A not so-fiber-related item that I bought was this posy pin. I've been watching Poirot on Netflicks, and love the pin he wears that holds a flower. So, when at one stall I found these posy pins made from old hollow handled table knives, I had to get one. Here it is with a bit of my (not yet open) lilac in it. I was even able to choose one from a flatware design similar to some of the silverware I grew up with.
The last goodie was food. One of the highlights of NY S&W is the fried artichoke hearts -- Artichoke French. Well, he was at Maryland S&W. By the time we went the line wasn't *too* bad -- I think we only waited about 20 minutes to get to the front, but so worth it.
All told, it was a lovely day. Even the weather decided to behave after a while (and my shoes brushed up just fine). The real treasures of the day were getting to enjoy it with friends and loved ones -- and to soak up all the creative energy that flows and ebbs around such an event. (I'll admit the numerous compliments on the shawl I was wearing were nice to receive).
Now, time to buckle down and get some embroidery going.
Tuesday, May 3, 2016
Sheep & Wool -- Maryland that is.
This weekend is the Maryland Sheep & Wool Festival. We're heading down on Saturday. My husband is, once again, a competitor in the Grand Lamb Cook Off. Last year he took 2nd place in the Adults category.
Meanwhile, I'm heading out to the festival itself to enjoy looking at fiber in all its glory. Everything from fiber producing animals to finished products will be available.
This festival is a bit smaller than New York, but it certainly doesn't skimp on inspiration. I spent a large part of my lunch hour today looking over the vendor list. I have started my "to look for" list also, but I'm sure there will be things that simply insist on coming home with me.
We'll be on site really really early (hubby has a very early judging time), and probably won't be leaving until they make us. There will be pictures posted, but until then, here are a couple of ones I got last year:
Meanwhile, I'm heading out to the festival itself to enjoy looking at fiber in all its glory. Everything from fiber producing animals to finished products will be available.
This festival is a bit smaller than New York, but it certainly doesn't skimp on inspiration. I spent a large part of my lunch hour today looking over the vendor list. I have started my "to look for" list also, but I'm sure there will be things that simply insist on coming home with me.
We'll be on site really really early (hubby has a very early judging time), and probably won't be leaving until they make us. There will be pictures posted, but until then, here are a couple of ones I got last year:
Tuesday, April 19, 2016
Rule breaking ... again.
I don't have a lot to say today, but, I will share that I'm about to break my "one knitting project on the needles at a time" rule ... again.
My husband started a new job -- one which has him spending significant amounts of time in a freezer, so I'm going to start this hat for him in some lovely black wool (colors are specified).
The yellow shawl I've been working is down to the last 80 pattern rows, so it should be done before too much longer, then I get to do this cowl in the beautiful colorful yarn recently purchased from KnitPicks.
And speaking of that KnitPicks order, another item I bought was a Needle Keeper.
The Needle Keeper is a simple metal tube with a cap at one end with a slit in it.
When using circular needles, simply slide the work down onto the cable, and stick the needles in the slit -- push them all they way down until the slit in the cap is gripping the cable, especially if you are using interchangeables, that will keep the join nice and safe
The needles stay firmly in place, and are protected from damage when your work bag is handled. I used the small silicone bands that held the Keeper to the sales card to hold my cable needle on the tube. I've been using it for a couple weeks and have been very happy with the results.
My husband started a new job -- one which has him spending significant amounts of time in a freezer, so I'm going to start this hat for him in some lovely black wool (colors are specified).
The yellow shawl I've been working is down to the last 80 pattern rows, so it should be done before too much longer, then I get to do this cowl in the beautiful colorful yarn recently purchased from KnitPicks.
And speaking of that KnitPicks order, another item I bought was a Needle Keeper.
When using circular needles, simply slide the work down onto the cable, and stick the needles in the slit -- push them all they way down until the slit in the cap is gripping the cable, especially if you are using interchangeables, that will keep the join nice and safeThe needles stay firmly in place, and are protected from damage when your work bag is handled. I used the small silicone bands that held the Keeper to the sales card to hold my cable needle on the tube. I've been using it for a couple weeks and have been very happy with the results.
Tuesday, March 29, 2016
Spring...
Flowers and trees blooming, warm, lengthening days... it must be Spring, when a fiber artist's thoughts turns to....
(with apologies to Tennyson). While I try to wear brighter colors even in the depths of winter, I do find that when shopping for materials, I tend to the brighter items as the Spring draws closer.
Like this yarn I just bought. Looking forward to using it for a bright colorful light weight cowl, just right for cool Spring evenings, and Summer air conditioned places.
It has been a long time since I actually studied anything about color theory (maybe Jr. High?). I mainly either follow the colors of a piece I am inspired by (for historic work), or just hold things together to see what I like. A number of years ago I realized that my wardrobe was almost entirely black, dark blue and brown, and I started to change that. I bought clothing and fabrics in brighter, jewel tones. I went through a "yellow period" (seriously, I had enough yellow tops to wear one every day to work). I started using combinations I had been taught (somewhere along the way) to avoid. Red and deep purple, for instance. I found that a skirt with flowers with specks of color paired well with a shirt pulling one of those speck colors.
I'd like to be a little more knowledgeable about it, though, and have started looking at some resources for understanding a bit more about color and how it works. The title of this website caught my eye: A beginners guide to beginning colour theory by someone who was never taught art. After all, Jr. High art classes were a long time ago. :)
So, stay tuned as I learn more and play with color, both modern and historic.
Meanwhile I think I'll go play with some bright threads.
Speaking of color, coming soon, maybe next week. more info on those 18th Century canvas work pocket books -- and wait until you see the riot of colors there!
COLOR
(with apologies to Tennyson). While I try to wear brighter colors even in the depths of winter, I do find that when shopping for materials, I tend to the brighter items as the Spring draws closer.
| All the colors.... |
It has been a long time since I actually studied anything about color theory (maybe Jr. High?). I mainly either follow the colors of a piece I am inspired by (for historic work), or just hold things together to see what I like. A number of years ago I realized that my wardrobe was almost entirely black, dark blue and brown, and I started to change that. I bought clothing and fabrics in brighter, jewel tones. I went through a "yellow period" (seriously, I had enough yellow tops to wear one every day to work). I started using combinations I had been taught (somewhere along the way) to avoid. Red and deep purple, for instance. I found that a skirt with flowers with specks of color paired well with a shirt pulling one of those speck colors.
I'd like to be a little more knowledgeable about it, though, and have started looking at some resources for understanding a bit more about color and how it works. The title of this website caught my eye: A beginners guide to beginning colour theory by someone who was never taught art. After all, Jr. High art classes were a long time ago. :)
So, stay tuned as I learn more and play with color, both modern and historic.
Meanwhile I think I'll go play with some bright threads.
Speaking of color, coming soon, maybe next week. more info on those 18th Century canvas work pocket books -- and wait until you see the riot of colors there!
Tuesday, March 22, 2016
Ravelry
I've mentioned Ravelry a couple of times in my posts, but I don't think I've ever talked about it. It's a lovely resource, primarily aimed at knitters and crocheters, though spinners, weavers, and embroiderers are also common on its pages. It's part resource, part social media.
You do have to have a log in (it's free), but after that you can use it as much or as little as you wish.
Go to the patterns tab to "shop" for patterns. You can browse casually, or use the "Pattern browser & advanced search" You can narrow down your search by a number of categories and sub categories. Keep selecting items to narrow by, then sort the results (I like to sort by newest first). My most recent search was for free knitting patterns for fingerless gloves, in English, using 150 to 300 yards of fingering yarn.
Using this search, I found several candidates for some of the rest of the yellow alpaca that is going into my current project. You can even ask it to search your library -- another feature of the site.
On the library, you can list all the books, magazines and individual patterns that you have. Later, when you put in a search, you just might find that you already have a pattern that catches your eye.
Another feature is the stash. When you buy yarn, you can list it in your stash -- and then later you can search for patterns that might be good for items in your stash (unless you buy yarn knowing already exactly what you're going to do with it....)
A big feature is "Projects" where you can record details of your ongoing projects -- for instance, here is the page for my current knitting project. I've recorded the pattern, the yarn I'm using, my progress and notes. When it's done, I'll maybe remember to go in and put in a picture.
There are also a large number of groups on the website -- the "social" part. I'll admit, I don't spend much time in there, other than occasionally to go in and see if anyone has posted the answer to a question I've had come up while I work. Just about any aspect of life experienced by people who work with fiber has a group.
This is just a little bit about this website. (BTW, my only association with Ravelry is that I'm on it). If you haven't, go check it out. And if you're there .. well, I'm KandyElizabet. Drop by and say "hi."
You do have to have a log in (it's free), but after that you can use it as much or as little as you wish.
Go to the patterns tab to "shop" for patterns. You can browse casually, or use the "Pattern browser & advanced search" You can narrow down your search by a number of categories and sub categories. Keep selecting items to narrow by, then sort the results (I like to sort by newest first). My most recent search was for free knitting patterns for fingerless gloves, in English, using 150 to 300 yards of fingering yarn.
Using this search, I found several candidates for some of the rest of the yellow alpaca that is going into my current project. You can even ask it to search your library -- another feature of the site.
On the library, you can list all the books, magazines and individual patterns that you have. Later, when you put in a search, you just might find that you already have a pattern that catches your eye.
Another feature is the stash. When you buy yarn, you can list it in your stash -- and then later you can search for patterns that might be good for items in your stash (unless you buy yarn knowing already exactly what you're going to do with it....)
A big feature is "Projects" where you can record details of your ongoing projects -- for instance, here is the page for my current knitting project. I've recorded the pattern, the yarn I'm using, my progress and notes. When it's done, I'll maybe remember to go in and put in a picture.
There are also a large number of groups on the website -- the "social" part. I'll admit, I don't spend much time in there, other than occasionally to go in and see if anyone has posted the answer to a question I've had come up while I work. Just about any aspect of life experienced by people who work with fiber has a group.
This is just a little bit about this website. (BTW, my only association with Ravelry is that I'm on it). If you haven't, go check it out. And if you're there .. well, I'm KandyElizabet. Drop by and say "hi."
Wednesday, March 16, 2016
All Zipped up....
Instead of putting up a blog post last night, I attended a class at Steve's Sew and Vac in King of Prussia on zippers. I think the last time I put in a zipper I was in college... so quite a long time!
We did four zippers total
We started with the basic center zipper. Even this was a little different since I last put in a zipper. We started as I recalled, with basting the seam for the length of the zipper (stopping just a little short, above the location of the bottom stop), and then a regular seam the remainder. Seam pressed open, then the new started.
We used Wonder Tape. There are a couple of brands out there, and it's available at sewing and quilting shops, and of course on Amazon. It is a double faced tape, very light in weight, and washes out. Ideal for sticking things together for long enough to take your next steps.
So, using Wonder Tape, we placed the zipper down on the seam. Another small change, we did not match the top of the zipper tape to the top of the fabric, but had it a little bit further. The recommendation is to purchase a zipper slightly longer than you need. Once the zipper is in place, the slide is moved down, the excess cut off, and the tops reinforced with hand stitched "stops." (There are also available metal stops that can be crimped in place). This makes it so that you don't have to work around the slide, which can make the seam a bit "wonky."
Using the regular or adjustable zipper foot, the zipper was sewn in place -- but first 1/2 inch Scotch tape was centered over the teeth. The edge of that tape gives a guide for stitching a nice line. I found the Scotch tape a little hard to see, and will be looking for some 1/2 inch painter's tape.
The result was a pretty nicely placed zipper. My stitching line wasn't the best, but I was using my very ancient adjustable zipper foot. The teacher was very against the "regular' zipper foot that came with the machine, though later I found it worked just fine.
Next up was the lapped zipper. This is like a center zipper, but with a small "flap" covering the zipper. Nice for pillows and cushions. This was done in a similar manner to the center zipper. The flap is made by making a fold in the seam allowance on one side after the basting stitch seam. I was very pleased by the look of this zipper. I look forward to using it for some cushions around the house.
Our next zipper was the invisible zipper. This is one I remember from all those years ago. No longer, however, does one have to buy a different foot for each brand of invisible zipper. No basting seam for this zipper -- it is installed one side at a time, very carefully running the teeth through the channel on the special invisible zipper foot. An excellent option for skirts and dresses. I suspect this will be my option when I make the fancy dress (dresses?) for attending weddings in October.
The last zipper was the "woman's fly" setting. Frankly, I'm hoping that my notes are good and clear, since this was the end of the class and I think I had reached my limit of absorbing more information. On the other hand, it's not something I actually expect to use often, and I have my sample and my notes to reference back to. I'm setting up my "classes, notes and tips" notebook and these notes will be there for when I need them.
So, that's it. I'm certainly not afraid of zippers any more, and will be ordering some of the very cute skirt patterns I've found on line. But that, as Alton Brown would say, is another post.
We did four zippers total
![]() |
| Center placement |
![]() |
| Center Placement |
We used Wonder Tape. There are a couple of brands out there, and it's available at sewing and quilting shops, and of course on Amazon. It is a double faced tape, very light in weight, and washes out. Ideal for sticking things together for long enough to take your next steps.
So, using Wonder Tape, we placed the zipper down on the seam. Another small change, we did not match the top of the zipper tape to the top of the fabric, but had it a little bit further. The recommendation is to purchase a zipper slightly longer than you need. Once the zipper is in place, the slide is moved down, the excess cut off, and the tops reinforced with hand stitched "stops." (There are also available metal stops that can be crimped in place). This makes it so that you don't have to work around the slide, which can make the seam a bit "wonky."
Using the regular or adjustable zipper foot, the zipper was sewn in place -- but first 1/2 inch Scotch tape was centered over the teeth. The edge of that tape gives a guide for stitching a nice line. I found the Scotch tape a little hard to see, and will be looking for some 1/2 inch painter's tape.
The result was a pretty nicely placed zipper. My stitching line wasn't the best, but I was using my very ancient adjustable zipper foot. The teacher was very against the "regular' zipper foot that came with the machine, though later I found it worked just fine.
![]() |
| Lapped Zipper |
![]() |
| There's the zipper, hiding |
![]() |
| Invisible zipper Would be more invisible if I had matched the fabric |
![]() |
| Invisible zipper. |
![]() |
| Fly zipper |
![]() |
| Fly zipper |
So, that's it. I'm certainly not afraid of zippers any more, and will be ordering some of the very cute skirt patterns I've found on line. But that, as Alton Brown would say, is another post.
Tuesday, February 2, 2016
Some modern resources for supplies.
I want to preface this blog post by saying I have no financial affiliation with any of the companies I'm about to list. They are some of my "go to" places for fiber related supplies. This is not an exhaustive list, it's the first handful that I can think of.
First, I always suggest your local needlework, yarn, sewing/quilting store if you have one. Even if they don't carry what you're particularly looking for, if you develop a relationship they may be able to order in stuff. There is also no substitute for the joy of what I call browsing the colors. Even if I walk away with nothing, I get a creative burst just from being in a place surrounded by the materials of my art(s). (Though I usually find *something* to buy.) By "your local store" I do not mean the big box craft stores, though they have their places.
Fireside Stitchery -- This is my "local needlework shop." They primarily cater to modern needlepoint, but happily sell (and talk) threads and materials with anyone. They also do mail order and will order in materials requested. Fireside carries most of the silk threads that I commonly use, as well as both DMC and Anchor stranded floss, Kreinik metalics, linen threads, and a wide variety of specialty threads. I rarely leave without one of their little plastic bags with something in it.
Nordic Needle -- This is an excellent website for many basic supplies. They also sell many of the embroidery fabrics available -- and many of them by the inch. For them, by the inch means a full bolt width and the number of inches ordered. They also have most of the more common cuts available for most fabrics. Nordic Needle has a wide focus, and is particularly famous for their Hardanger supplies and designs. They do have a store, in Fargo, ND -- so there are people for whom they are the local needlework store.
Threadneedle Street -- This is another website selling a large variety of threads, fabrics and other supplies. They also sell the new manufacture of DMC Medici. So far, this is the only thing I've bought from them, though the experience was very good and I expect they will see more of my business. Threadneedle is a local needlework store for anyone in or near Issaquah WA.
Lacis -- Another store that is far away but also as close as my computer. This California company has a focus on historic needlework and is one of my sources for both linen threads of different weights and metallic threads. I have gotten some great tools and other supplies from them as well.
Knit Picks is one of the websites I go to for yarn, and one of the catalogs that is referred to as "oh, here's danger" when it hits our mailbox. Low prices on decent yarn, making experimenting in knitting a reasonable thing to do.
Webs is another website for yarn -- and a local store for Northampton, MA. I've been a couple of times thanks to the fact that I seem to keep going to events in Massachusetts. I have not actually experienced their web/mail order interface but the people there are fantastic, and I always leave with several new projects on my list.
Well, there are lots more, and this is the beginning of a new page I'll be setting up -- "Resources."
Oh, and those big box craft stores? In my area that means ACMoore, Michaels and JoAnn's. Well, they get plenty of my business as well :)
First, I always suggest your local needlework, yarn, sewing/quilting store if you have one. Even if they don't carry what you're particularly looking for, if you develop a relationship they may be able to order in stuff. There is also no substitute for the joy of what I call browsing the colors. Even if I walk away with nothing, I get a creative burst just from being in a place surrounded by the materials of my art(s). (Though I usually find *something* to buy.) By "your local store" I do not mean the big box craft stores, though they have their places.
Fireside Stitchery -- This is my "local needlework shop." They primarily cater to modern needlepoint, but happily sell (and talk) threads and materials with anyone. They also do mail order and will order in materials requested. Fireside carries most of the silk threads that I commonly use, as well as both DMC and Anchor stranded floss, Kreinik metalics, linen threads, and a wide variety of specialty threads. I rarely leave without one of their little plastic bags with something in it.
Nordic Needle -- This is an excellent website for many basic supplies. They also sell many of the embroidery fabrics available -- and many of them by the inch. For them, by the inch means a full bolt width and the number of inches ordered. They also have most of the more common cuts available for most fabrics. Nordic Needle has a wide focus, and is particularly famous for their Hardanger supplies and designs. They do have a store, in Fargo, ND -- so there are people for whom they are the local needlework store.
Threadneedle Street -- This is another website selling a large variety of threads, fabrics and other supplies. They also sell the new manufacture of DMC Medici. So far, this is the only thing I've bought from them, though the experience was very good and I expect they will see more of my business. Threadneedle is a local needlework store for anyone in or near Issaquah WA.
Lacis -- Another store that is far away but also as close as my computer. This California company has a focus on historic needlework and is one of my sources for both linen threads of different weights and metallic threads. I have gotten some great tools and other supplies from them as well.
Knit Picks is one of the websites I go to for yarn, and one of the catalogs that is referred to as "oh, here's danger" when it hits our mailbox. Low prices on decent yarn, making experimenting in knitting a reasonable thing to do.
Webs is another website for yarn -- and a local store for Northampton, MA. I've been a couple of times thanks to the fact that I seem to keep going to events in Massachusetts. I have not actually experienced their web/mail order interface but the people there are fantastic, and I always leave with several new projects on my list.
Well, there are lots more, and this is the beginning of a new page I'll be setting up -- "Resources."
Oh, and those big box craft stores? In my area that means ACMoore, Michaels and JoAnn's. Well, they get plenty of my business as well :)
Tuesday, January 19, 2016
Tool talk -- and "cross shopping"
Do you "cross shop?" That's the phrase my husband and I use for buying items in a store aimed at one hobby or occupation to use in another.
(Please note, none of my comments are meant as specific endorsements, or anti-endorsements of any one retailer. In fact, every retailer listed is one I regularly shop from, for something...)
Sometimes, cross shopping is just less expensive. For example, several yarn suppliers sell the foam "puzzle pieces" to use for blocking mats. For example KnitPicks* has a set of nine 12 inch mats, currently selling for $24.99. All put together, that's 36x36 inches of blocking. On the other hand, Harbor Freight sells a set of four 24 inch anti-fatigue foam mats, which are the same material, for $17.99 (often on sale for $9.99). All put together, that's 50x50. I have the Harbor Freight mats. I do put a towel down between the mat and my work, but at 50x50 I've been able to block even my larger shawl.
Boxes good for sorting little bits of things are often less expensive in the sporting goods department (think fishing tackle) than in the crafts department -- for essentially the same boxes. (This used to be more true, apparently the retailers are catching on to this).
Canning jars, which are very popular (or being pushed anyway) in the crafts stores are less expensive when purchased by the dozen at the grocery, hardware, or big box stores than when purchased by the piece at the craft stores.

And sometimes, cross shopping just finds you the best tools. Like magnets. One of the most important tools I have in my studio is this long reach magnetic pick up purchased at Harbor Freight. It is a very strong magnet and has a "quick release" for removing the items picked up. Granted, it doesn't pick up everything that might get dropped in the studio, but pins, scissors, and other tools are easy to retrieve.
I have a small telescoping one on my desk downstairs, too.
Wherever I go, I keep my eyes and mind open as I look at products, as other uses may come to mind -- a kitchen twine holder easily becomes a thread ball holder, for instance. The little jars for beads that screw together in a stack could easily hold small hardware bits, or the seasonings needed for a given dish.
Our greatest cross shopping find, however, was certainly the old library card catalog, which has become the sorter and holder of "little things I want to be able to find"... pens, pencils, batteries, the cats' grooming supplies, wire....
So, always keep your eyes open -- you never know when you'll find just the right tool for something, even if it isn't the original purpose.
(Please note, none of my comments are meant as specific endorsements, or anti-endorsements of any one retailer. In fact, every retailer listed is one I regularly shop from, for something...)
Sometimes, cross shopping is just less expensive. For example, several yarn suppliers sell the foam "puzzle pieces" to use for blocking mats. For example KnitPicks* has a set of nine 12 inch mats, currently selling for $24.99. All put together, that's 36x36 inches of blocking. On the other hand, Harbor Freight sells a set of four 24 inch anti-fatigue foam mats, which are the same material, for $17.99 (often on sale for $9.99). All put together, that's 50x50. I have the Harbor Freight mats. I do put a towel down between the mat and my work, but at 50x50 I've been able to block even my larger shawl.
Boxes good for sorting little bits of things are often less expensive in the sporting goods department (think fishing tackle) than in the crafts department -- for essentially the same boxes. (This used to be more true, apparently the retailers are catching on to this).
Canning jars, which are very popular (or being pushed anyway) in the crafts stores are less expensive when purchased by the dozen at the grocery, hardware, or big box stores than when purchased by the piece at the craft stores.

And sometimes, cross shopping just finds you the best tools. Like magnets. One of the most important tools I have in my studio is this long reach magnetic pick up purchased at Harbor Freight. It is a very strong magnet and has a "quick release" for removing the items picked up. Granted, it doesn't pick up everything that might get dropped in the studio, but pins, scissors, and other tools are easy to retrieve.
I have a small telescoping one on my desk downstairs, too.

Wherever I go, I keep my eyes and mind open as I look at products, as other uses may come to mind -- a kitchen twine holder easily becomes a thread ball holder, for instance. The little jars for beads that screw together in a stack could easily hold small hardware bits, or the seasonings needed for a given dish.
Our greatest cross shopping find, however, was certainly the old library card catalog, which has become the sorter and holder of "little things I want to be able to find"... pens, pencils, batteries, the cats' grooming supplies, wire....
So, always keep your eyes open -- you never know when you'll find just the right tool for something, even if it isn't the original purpose.
Tuesday, January 5, 2016
Holiday crafting revealed
My main two non-historically based projects in December were holiday gifts.
First, a scarf for one of my bosses. Using yarn I bought at Rhinebeck and the pattern "Learn to Knit a Spiral Scarf" on Ravelry. It was a pretty quick knit, and I no longer have fear of short rows.
I love how the curls can be tight....
Or, really loose.
Each year's ornament includes the year and an acorn. This year all on the same side.
The ground is linen and the thread is silk.
This is the first year with a plain back.
First, a scarf for one of my bosses. Using yarn I bought at Rhinebeck and the pattern "Learn to Knit a Spiral Scarf" on Ravelry. It was a pretty quick knit, and I no longer have fear of short rows.
I love how the curls can be tight....
Or, really loose.
The second holiday crafting was an ornament. Very close friends adopted a baby a few years ago -- now she is a lovely young girl. The year she came home, I purchased a Christmas chart based on Quaker embroidery motifs. It has enough motifs for me to do one ornament each year until she is 21. Here is this year's ornament.
The ground is linen and the thread is silk.
This is the first year with a plain back.
I did a blanket stitch with just two strands of very fine silk around the edge.
Now, it is back to my Bay of Fundy scarf for my modern work, though most focus will be on "period" embroideries for some time going forward now.
Tuesday, November 24, 2015
Breaking a rule....
I’ve broken one of my rules, but it’s all in the name of the holidays.
My yellow Bay of Fundy scarf is about half done. How do I know? I’ve just about finished one hank of the yarn and it is about 33 inches long. I have three more hanks, but I don't think it will take more than one more. Here’s an in progress shot. Can’t wait to see what it looks like all done and blocked. I’m considering blocking this half a) to see how it looks and b) to make the final blocking a little easier. Thoughts?
That's the whole thing (so far) to the left, pinned to the box for a Billy bookcase. Love the cable pattern. That little ball is all that is left of the first hank - just a few more rows, I'm sure.
However, the End of Year Holidays are approaching. Whatever you call it, December is a time of celebration, family, friends and gifting. Well, ok, for us the gifting usually goes well into January … and sometimes beyond, but late November and December is the season of considering gifts, and making them. So, here’s the rule breaking – my usual rule is “one knitting project at a time.” Considering the number of other projects I have going at any given time, *some* area of my crafty world needs to be reigned in. However, I really want to do a knitted gift for my new boss, so that has gone on the needles. It will be fast, and I’ll move back to the yellow scarf/wrap soon.
Not only that, but I’m learning something while I do it. The project I’m doing is all about short rows. Why was I afraid of them? Apparently I have come far in my knitting since I did socks. When I did the short row heels on the socks, I slavishly followed the directions, but didn’t really “get” what I was doing, I just followed the pattern. This time, however, as I do segment after segment on this lovely ruffle scarf, I’m “getting” it. I see where they’re going and what they’re doing.
I call that worth a small rule break, how about you?
Sorry, no value added photos until after the gift has been given…. Not sure if she reads this blog, but I like surprises to be surprises.
Tuesday, November 10, 2015
Warm hands...
Fingerless mitts will save my life. My office is cold -- I sit on the lower level of the building, on a slab, with a poorly insulated door to the outside behind me. I have a space heater which keeps my feet nice and warm, but my wrists and hands still get cold, particularly when I have a big dictation or other work to type.
So, I make fingerless mitts. My newest pair are the Salto Mitts, I purchased a kit from Craftsy which included the pattern and a hank of the Manos del Uruguay Silk Blend, I did run out of yarn just as I was binding off on the second glove, with that bind off and the thumb to go. I sent an email to Craftsy, hoping for ideas of how to finish my project -- and they sent me a second hank. Being a different dye lot, the color was *a little* different, but not so much as to bother me. I plan to use the rest of the hank (most of it) to do a charity item -- a premie hat or something of the sort.
Meanwhile, here are some pictures. No more cold hands.
The lacy band runs up the back, but stops so the palms are solid

They cover a goodly part of my fingers, but do not have dividers between fingers (which makes them fingerless "mitts" rather than fingerless "gloves"), so I have full range of motion
And they well cover my bothersome thumb joints.
So, I make fingerless mitts. My newest pair are the Salto Mitts, I purchased a kit from Craftsy which included the pattern and a hank of the Manos del Uruguay Silk Blend, I did run out of yarn just as I was binding off on the second glove, with that bind off and the thumb to go. I sent an email to Craftsy, hoping for ideas of how to finish my project -- and they sent me a second hank. Being a different dye lot, the color was *a little* different, but not so much as to bother me. I plan to use the rest of the hank (most of it) to do a charity item -- a premie hat or something of the sort.
Meanwhile, here are some pictures. No more cold hands.
The lacy band runs up the back, but stops so the palms are solid
They cover a goodly part of my fingers, but do not have dividers between fingers (which makes them fingerless "mitts" rather than fingerless "gloves"), so I have full range of motion
And they well cover my bothersome thumb joints.
Tuesday, October 27, 2015
A couple of "done" knitting pieces
Quite a while ago (about 2 years ago), My husband and I were walking through one of the big box stores and saw that they had some Lion Brand Fisherman's Wool on a very good sale -- the big 4 oz skeins for $5.00. The dark brown and the natural drew him over to the display, and I agreed to buy some and make him something.
After several enjoyable sessions browsing patterns on Ravelry, we agreed on this vest. I finished up the project I was working on at the time (I try to have only one knitting project going at a time), and cast on in May 2014.
Now, knitting keeps getting put down. It is my "between" project, my "clear my mind when embroidery has filled it up too much" work. So, it took quite a while to finish. I bought buttons for it at Rhinebeck 2014 and continued to work on it sporadically.
I finally finished the knitting while we were on vacation in May, and quickly made up a pair of these fingerless gloves to go with the vest. Then both projects sat in my project bag most of the summer (while I worked on something else, but that's another post). The week before Rhinebeck, I finally pulled out the vest, did all the weaving in, blocked it and added the buttons. He proudly wore both the vest and the fingerless gloves to Rhinebeck this year.
This was my first truly sized piece. I've done socks, but didn't really follow different directions for size on those. I'm pretty happy with the final result. Don't know that I'll be doing a lot of constructed garments -- I like doing shawls and scarves and fingerless gloves -- but I'm glad to know I was able to suss out the instructions for shaping and making it up.
After several enjoyable sessions browsing patterns on Ravelry, we agreed on this vest. I finished up the project I was working on at the time (I try to have only one knitting project going at a time), and cast on in May 2014.
Now, knitting keeps getting put down. It is my "between" project, my "clear my mind when embroidery has filled it up too much" work. So, it took quite a while to finish. I bought buttons for it at Rhinebeck 2014 and continued to work on it sporadically.
I finally finished the knitting while we were on vacation in May, and quickly made up a pair of these fingerless gloves to go with the vest. Then both projects sat in my project bag most of the summer (while I worked on something else, but that's another post). The week before Rhinebeck, I finally pulled out the vest, did all the weaving in, blocked it and added the buttons. He proudly wore both the vest and the fingerless gloves to Rhinebeck this year.
Subscribe to:
Posts (Atom)