Showing posts with label Teaching. Show all posts

Monday, May 30, 2016

Progress!

While I'm working on my designs and schedule for the projects for my expert panel in September, I returned to a project that I really wanted to complete well before this -- and certainly before the "all couching all the time"  -- the sample for my German Brick Stitch class.

Here is a picture of the completed embroidery.

Because I made the mistake of working it all the way to the frame, the edges aren't quite neat enough, but I'll fix that once it's off the frame and I can get at the holes.  Then I'll trim the edges and do a lining.  The line where the design changes will be the bottom, and the top and bottom will be the opening at the top of the bag.  I'll attach lining pieces to the two ends then sew the lining seams (side and bottom).  The bag I'll fold wrong sides facing and fold in the side seams and over stitch - first with some linen, and then with one of the silks for a decorative edge.  That will prevent the need to turn it after stitching which can put extra stress on those seams.  The lining bag will tuck in, and then a drawstring will go in at the top.  Photos of the finishing will be a future blog.

Overall I'm happy with the piece as a teaching piece.  I would normally do all one design, but I wanted the teaching piece to have an easier and a more difficult counting design offered.

Now, on to preparing for next weekend's event, where I will be working on the Marshall hanging and enjoying time with other fiber arts folks.


Monday, March 14, 2016

The Academy of St. Clare - Event "report"

This weekend just past I attended and taught at The Academy of St. Clare, Stitches in Time in the Shire of Abhiann Ciach Ghalis, part of the Kingdom of Aethelmearc (or, in the modern world, Milmont, Pennsylvania).

The event was held at a lovely boy scout camp, with quite comfy cots in a cabin and a large dining hall/general building for most of the meetings and classes.  Sadly, as too often happens, my camera did not come out of my basket, so my words will have to do.

I arrived Friday night (a little later than originally expected, due to some modern world issues) to a warm welcome.  The evening's activity was slated to be a round table on tools and suppliers for needlework.  The time I spent in the general room conversation was more general, which was not a bad thing.  Then I retired to the sleeping area I was to be in to catch up with friends.

Saturday morning we all got up bright and early and readied ourselves for a day of learning and sharing.  The main building for meals, meetings and classes was not far, and before long we were all assembled for breakfast and a keynote talk on the topic "Common Ground."  Duchess Meriwen uerch Owein entertained and us and gave us a lot to think about on the whys and wherefores of embroidery through history.

Having had our bodies and minds fed, it was time for the morning classes.  I attended the first part of the class "From Picture to Pattern" then wandered over to listen to the end of the class on the Oxburgh Hangings.  Both very interesting classes.  Though neither class was completely new material to me, I find that attending classes on "known" subjects often brings a nugget of new to add to my own thoughts and knowledge. Two other classes were in the morning session, "Tools and Supplies for the Beginning Embroiderer" and "Handsewn Applique: A Hands on Practical Approach."

After the morning classes there was time to look at the items that had been brought for the embroidery display -- and to fondle silk for sale.  I successfully admired others' work, and avoided the siren call of the silk.

Lunch was a lovely array of food and time to chat and share what we had learned so far.  Then it was time to clear up and prepare ourselves for the afternoon classes.  This was the unique part of the event.  Instead of the usual 1 hour "try it" type of class usual for SCA events, these were three hour full project classes.  My only regret is that since I was *teaching* one, I couldn't *take* one. There were four classes: 16th Century White Work, Embroidered Hoods, Pleatwork Embroidered Apron, and the one I was offering, German Brick Stitch. I probably would have been hard pressed to pick just one of the other three if I had not been teaching!

I had three students. At first I was concerned that I wouldn't be able to fill three hours.  When I "practiced" the class in my head a bit, I had thought about setting a schedule along the lines of "for the first X minutes we'll work on this, then I'll move them to that...." but it did not work that way.  As I have for the two times I taught the smaller class, I started by showing how I had set up the canvas (done for them in the interest of saving stitching time), then had them start with the very middle bit of the design.  While they worked I talked about the design, about how I worked it, and about the second design in the kit.  Then, I mostly sat back and let them stitch, answering questions and helping as needed.  The best part of the three hour format for this particular project is that it gives time for a goodly chunk of the work to be done. Even the slowest stitcher had one diamond complete, and the fastest of the three had most of her first framework done by the end of the day.  I did fill in some of the silence by talking also about the uses of brick stitch.
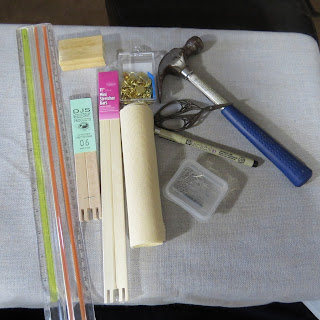
One of the kits all lined up to be constructed

Finally, after the afternoon classes were done everyone gathered back in the main building (at least one of the classes was in another building) for more display viewing, shopping and socializing over tea.

Supper was a lovely meal of foods not unfamiliar to the modern palate, but also period -- a great balance.

After supper we gathered our things and returned to the sleeping cabin which has a meeting room attached to it where more round table discussions took place. Many ideas were shared, and one thing was said which has added another project to the array I'm working on for my supporting pieces for my expert panel.  Finally, eyes no longer able to stay open I headed for my comfy cot and got a good night's sleep.

Sunday morning they weren't done with us -- providing breakfast and two talks on documentation and research, leaving lots of information and thoughts to swirl in my head as I drove home.


Tuesday, March 8, 2016

A Monday-Tuesday... kind of post

This post is mostly brought to you by the letters O, M, and G...

As in OMG, I've known for *how* long that I'm teaching this weekend and I'm still this far behind?

So, part blog post, part brain dump.

German Brick Stitch teaser photos

It all started with a lonely diamond of stitches, centered in the top half of the working area.

Soon, he was joined by several more, and the central flower.


Then, the first lattice was begun.  In order to keep it easy -- most counting is of stitches of four threads, and placement is as much about location relationship as about extensive counting, for a design with a lattice I like to lay down that lattice first.


Once that first layer of lattice is down, the second one is easy, since it runs right along it.  Placement of the little blue diamonds and the filling of the individual motifs is also easy.


All the flowers.  Time to fill in.


And, finally, all the backgrounds done.  The class project will be smaller.


But, of course, that is only one side.

The second pattern is one that requires a little more careful counting -- since it is is made up of stitches of varying lengths.

So, first, the lattice

 Then, the inside "hatches" and the blue insides.

 Well, that's as far as I have photos for.  Once I've taught the class, I plan to make up versions of the handouts for both this project and the scissor/key fob project that can be downloaded.

So, "watch this space."

And now, back to kit assembly.


Monday, February 22, 2016

Teaching .. and an update

First, about the teaching

For the past two weekends I have had the opportunity to teach about German Brick Stitch.  This was the "shorter, one hour, small motif" version of the class I am working on for March (at this event).

The models for the one hour one motif class.
First, was in Delaware.  I had a total of 10 students (it's a good thing I always bring a few extras of materials!).  Walking in skill level ranged from complete novice to very experienced in other counted forms.  I believe the students enjoyed the class and walked away interested in the form.  I did give myself a few "notes" -- things to work on or change, and I made a couple of changes to the handout as a result.

Then, just this past weekend I taught again in Massachusetts. This time I had 12 students (I think, that number is based on the the fact that I walked in with 13 hand outs and out with 1).  Again, I think the students enjoyed it. In fact, I know one did, as she has posted that she now wants to German Brick Stitch all the things. Here is a picture of her completed piece:
Completed class project by Susan Young
I have again walked away with some thoughts and changes to make.  I plan to make those changes to the handout for the one hour class and then adjust it so that it can be put on the web as a self directed project. 

For those who want more information on German Brick Stitch, I recommend the website of Master Richard Wymarc. I provided copies of one of his pages with the class, and the chart for this motif comes from his materials.  Such a lucky man to have been able to spend so much time studying the pieces at the V&A.  I hope that my students visit his site and continue to grow in the form.

Now, for the update. Do you remember this post about the Pel/Laurel medallion I did for a coronation cloak?  That would be this one:

Well, the event in Delaware was a royal progress, and I was amazed to hear my own name called out to approach Her Majesty of the East.  Her Majesty of Meridies had arranged for my Queen to be her hands to present me with the Meridian Majesty, name me an Embroiderer to her Court and present me with her token.  I was very lucky no one approached me with a feather, because I would have been on the ground.  I remain touched and honored.  During the week that followed a video was posted of my Laurel and my apprentice sister receiving the same award and honors for that cloak, at, we believe, about the same time. 

Now, on to finish writing the longer Brick Stitch class, and more work on Couching and Laid work pieces!  If you took either class, I'd love to receive photos of your completed project -- I'll be setting up a "classes" page and will include them there.  


Monday, January 11, 2016

Another process post.

When last we left the process of creating my German Brick Stitch class (here) I had selected materials and was about to settle on design.

Stage 3 Design confirmation

I knew that I want to jump from some of Master Richard Wymark's patterns.  They are clear and concise, and he had the advantage of being able to study the original pieces extensively.   After a little fiddling around, I stayed with my original plan to bounce from the item identified as part of a stole or mantle.  This is a nice easy pattern, all the stitches are the same four count. This will be the first part stitched in the final project and the one covered in the class. I have strayed from my original plan for the second design, moving to a different embroidered bag design.  It is similar to the one I was originally going to use.  It is a more complex design, requiring a little more attention to counting as the stitches vary in length from two to six count. 

For the class both designs will use the same colors: dark red, dark gold, yellow, blue (all silk) and white (linen).  

Stage 4 Stitch testing

Finally, it was time to test everything.  Normally for testing for a project, I just do a small bit of stitching including all colors on a "scrap" piece of fabric.  In this case, however, "stitch testing" was actually "kit testing" -- make sure the information will translate, confirm how much thread will be needed, consider shots to take for the handout.

I started by assembling my frame and marking the stitch area.  The piece will be stitched on a rectangle -- half in one design and half in the other.  When removed from the frame it will be folded in half and sewing up on the sides to make a bag.  I am not including photos of how I marked out the stitch area -- because it is not the way it will be done for class.  Not that I don't want to show I can mess up too, but because I don't want to confuse people.

Finally, I began to stitch.

Here is the main motif done in colors selected.  To make the project a little easier, I am dropping the animal motifs and simply doing an alternation of the motif as shown and the motif done with white linen thread and filled with the dark gold.  All motifs will have the blue "spots."

The reasoning behind the revision relates mostly to streamlining the design for learning -- and for reduction in the number of colors needed.

I completed the first half and quickly determined that the Trebizond silk I bought will not be the recommended thread for this as a learning project.  This photo shows one of the reasons.  Trebizond is picky.  It twists up, coverage is inconsistent from color to color and to have enough to finish the project it will be *expensive*. The kits will not be inexpensive, but the Trebizond was going to make it very much so.

Of course, I'll finish my first bag with the Trebizond, but the second one will be done with Splendor -- one of the recommended threads.  yes, there will be a second one, I still have to do photos for the handout.

 Progress shot. Once I had the first motif in place, I placed the rest of the lattice, first in the red, then the gold.  All those diamonds will be filled in once the center motifs are placed.

 Here all the motifs have been completed, ready to fill.
And finally, the full piece -- or the one half.

Ultimately, I did a larger area than we will do for the class.  This gave me a solid 'feel' for the design and plenty of opportunities to determine recommended stitch and working order.


I'm working on the second side now, the lattice is in place and the center motifs have been started.   Then, I just need to write up the handout (while doing a second, smaller piece).

Tuesday, November 17, 2015

Tools -- teaching and organization

Remember the Certs commercials?  "Two, two, two mints in one?"  Well today's tool is two tools in one.

It's a teaching tool, and an organizational tool.

Well, ok, maybe I'm stretching the analogy, but this really is one of the most important-to-me tools for teaching, and for organizing in my studio.

Ready to go up to the studio and be
freshened up/restocked.
It's these boxes (no, not the bag on top, the clear boxes with the green lids).

They are the 13x13 ornament boxes in the Snap 'N Stack line by Snapware.  They're available on Amazon and we're coming into the time of year that they're available at lots of local stores -- Home Depot, Lowes, JoAnns'.

There are other sizes and styles available as well.  They are not inexpensive, but as the year winds down, you can probably find them on pretty deep discount.  I expect I'll be picking up another pair or two.

Each one has the kit materials for a class.  I try to keep them stocked (though I do need to go through them and clean them up) -- so when someone contacts me and says "hey can you teach at X event" I can easily say 'yes' if I'm free that weekend -- if I've been good about keeping them stocked, I usually just need to print documentation.  If I collect fees or donations for a given class, I keep that money in the box until I need to purchase materials for that class.

The boxes stack up, and snap together so if teaching more than one class, I can take the boxes for all in one stack.

Here you can see the locking mechanism.  Kind of hard to see in this photo, but on the bottom of each box there are clips just like the ones on the lid, that's how they stack together.

One of my plans is to set up a box of the tools that I always take when teaching -- scissors, needles, needle threaders, pens and pencils, among other items.

That's how they're a teaching tool.  They're also an organizational tool not just because they keep the teaching materials organized, but becuae they help me keep the studio organized -- they have their own spot (big enough for a couple more), so when they are returned to the studio, they go right in their place.

Two, two, two tools in one.

Monday, September 28, 2015

Linen on Linen

I will be participating next weekend in a demo at the German Society of Philadelphia.  I was particularly requested to talk to participants about German embroidery.  I'm putting together a little bit of a slide show of some of my favorite pieces from the area now known as Germany, as well as little kits for a brick stitch square for those so inclined.  German embroidery includes much more than the brick stitch pieces, though.  I'm working to include some of the different styles in my slide show.

One of those styles is the linen on line, or white work known as Opus Teutonicum. It is primarily from the 13th and 14th centuries, such as this altar cloth at the Cleveland Museum of Art (1948.352) is all white linen thread on white linen and has been dated to circa 1350.  On my first trip to the Cleveland it was hanging in a hallway.  I got some photos, but it was still in the days of film cameras and I will need to hunt down the actual physical prints.  This altar cloth is plates 154-157 in Schuette* lists four stitches.

Another one of the pieces that will be in my slide show is this hanging in the V&A, Museum number T.126-1931

This piece is dated 1587 so is quite late in SCA "Period."  It uses a larger variety of stitches (7 by the museum's count) and is worked in both brown and white linen threads on linen.

As so often happens, researching or assembling one thing leads me down another path. As I grow in my enjoyment of free embroidery stitches (when I started I was primarily a counted embroidery person -- now I'm about 50/50), I contemplate that something based on the Teutonicum will be in my future. 

But for now, back to pieces already in rotation, and planning a talk.

*Schuette refers to A Pictorial History of Embroidery, (Schuette, Marie and Muller-Christensen, Sigrid, King, Donald, Trans. Frederick A. Praeger, 1964)

Thursday, September 17, 2015

Thursday Update 9/17/15

Last night was A&S Night, and it is now time for my weekly project update.  But, first, time to brag on my student, who has taken to embroidery well.  She added some herringbone to her new hood:


I know she plans to continue it along the top seam as well.  The hood will be lined, and then she plans some more embroidery along the edges.  

Together with those things else that I did in the last week, here is my ...

Current project list/status (SCA/Historic):
  • Medallion for a coronation mantle -- confirmation received that it arrived at its destination and it is liked.
  • Motifs for coronation cloaks (different coronation) -- Complete turn around -- not going to be applique, but embroidered and then the motifs will be appliqued to the cloaks (because the wool did not arrive in time for proper completion.  The first of four is almost done -- and I know from previous experience that the next three will go faster. 
  • Planning for teaching.  Also in October (boy, October's a big month for my work), I'll be teaching German Brick Stitch at a demo.  I need to assemble kits and maybe frame up a piece to be working on.  This will be addressed this weekend.
  • Marshall Hanging -- the very large Bayeux inspired piece that I've been working on (on and off) for just about forever.  Deadline, June 2016. I expect there will be an update post shortly. No additional work this week.
  • Hem stitched square -- Now 3 sides are done.  Currently my travel piece.  With no deadline, and just for me just for fun, I'm ok with slow progress on this one.
  • Additional couching & laid work pieces. The June 2016 deadline is for a very special presentation to the East Kingdom embroidery guild, Keepers of Athena's Thimble.  In addition to the master work of the Marshall Hanging, I need supporting pieces in other forms of laid and couched work.  There will be posts as these are done. Some research and Pinteresting have been done.  The proposal I sent out involves this project as well as the requested item.  Two birds and all that.

Current project list/status (Modern): (oh, look, no progress here.... working on a deadline will do that).
  • Knitted Salto fingerless gloves from Craftsy kit using Manos del Uruguay Silk Blend.  I'm so close to done on this one.  It was a lovely kit, which unfortunately didn't have enough of the yarn.  I got another skein and have to wind it off and finish. 
  • Knitted vest for Joe.  Knitting is done.  Just have to do blocking, weave in the ends and sew on the buttons.  
  • Skirts for work.  One skirt that had been languishing in my studio has had some work done, and now just needs a hem.  I also have some lovely blue and white fabric waiting to be the next skirt. 
  • Alpaca stole.  Beautiful yellow alpaca yarn purchased at Rhinebeck last year has been wound.  This is my next knitting project, and should be cast on in time to be what I'm working on at this year's Rhinebeck. I'm going to be using a pattern found on Ravelry, the Bay of Fundy Scarf. I think it will be lovely in the yellow. 

Thursday, September 3, 2015

Thursday again

Today is, once again, Thursday, and yesterday was A&S Night.  There has been some good progress since last week, and my student joined us again.

Last night's lesson was stem stitch and split stitch. I think next week I'm going to have to give her a better piece of fabric for her sampler, as the one she is working on is fighting her tension.  Maybe a better hoop, too.  Until now all my teaching has been "here are materials to get you started on the concept" but this time it's more long term, I think she deserves more long term materials.

I worked a little bit on my hemstitch piece, and the design for the work that will take up most of September was nailed down.

Current project list/status:
  • Medallion for a coronation mantle -- THIS IS DONE and will be the subject of an October post (after reveal).  I am overall happy with this piece.  I was tracking time -- just under 40 hours.
  • Motifs for a Laurel cloak -- DONE.  All three motifs done and sent on.  This will quite possibly be the subject of Monday's post.
  • Motifs for coronation cloaks (different coronation) -- Sizes have been determined, fabric chosen and (I believe) ordered and by the end of this weekend I expect to have the pattern pieces ready.  This will be applique, as the best way to get four rather large motifs done in time -- and since they can be assembled without the final cloaks in hand, then applied at the end.
  • Planning for teaching.  Also in October (boy, October's a big month for my work), I'll be teaching German Brick Stitch at a demo.  I need to assemble kits and maybe frame up a piece to be working on.
  • Marshall Hanging -- the very large Bayeux inspired piece that I've been working on (on and off) for just about forever.  Deadline, June 2016. I expect there will be an update post shortly. No additional work this week.
  • Hem stitched square -- about half way through the third side.  Currently my travel piece. A few more stitches were done last night, but planning communications, teaching and headache intervened -- some work is just too fine to do with a headache :)  With no deadline, and just for me just for fun, I'm ok with slow progress on this one.
  • Additional couching & laid work pieces. The June 2016 deadline is for a very special presentation to the East Kingdom embroidery guild, Keepers of Athena's Thimble.  In addition to the master work of the Marshall Hanging, I need supporting pieces in other forms of laid and couched work.  There will be posts as these are done. Some research and Pinteresting have been done.

Thursday, August 27, 2015

Thursday round up

Last night was A&S night -- and we even had company.  A new-to-SCA, new-to-embroidery (but not to artistic endeavor) teen came over and started her own sampler of stitches. With an excellent artist's eye, her first stitches of some (un-counted) double running, herringbone and cross stitches were neat and close to even. Her herringbone was more even than some of that I have running all up and down tunic seams.

And, of course, she left before I even *thought* to take pictures...

I also got some embroidery done on the third of three motifs I'm working for a Labor Day elevation.

Because of having company/a student, I did not immerse myself in my studio looking for materials to answer a question, but I will work on that -- and maybe even develop a post from it.

All in all, a pretty good A&S night.

Current project list/status:
  • Medallion for a coronation mantle -- very close to done, though a more formal post will have to wait until after the coronation in October.  I've been keeping notes, and I think it will be a fun post, if you like a running almost daily report :) This will be my project as soon as the next one is done.
  • Motifs for a Laurel cloak -- two of three motifs are done. Deadline of August 29 may not quite be hit -- but they will be in the next person's hands by early next week. Formal post will be after labor day.
  • Motifs for coronation cloaks (different coronation) -- this has been assigned and planning has happened.  Currently waiting for materials and specific size information requested.  This is an applique project, and the pieces will be a bit larger than the other items. Again, formal post will be after the coronation, but I plan to draft the post as I work.
  • Marshall Hanging -- the very large Bayeux inspired piece that I've been working on (on and off) for just about forever.  Deadline, June 2016. I expect there will be an update post shortly. No additional work this week.
  • Hem stitched square -- about half way through the third side.  Currently my travel piece. A few more stitches have been done this week, but I've been concentrating on the ones due soonest. 
  • Additional couching & laid work pieces. The June 2016 deadline is for a very special presentation to the East Kingdom embroidery guild, Keepers of Athena's Thimble.  In addition to the master work of the Marshall Hanging, I need supporting pieces in other forms of laid and couched work.  There will be posts as these are done. Some research and Pinteresting have been done.


Sunday, March 23, 2014

Working and teaching

Saturday was the SCA event Mudthaw.  This year I participated as part of the "Artisans' Row" -- a gathering of artisans working on projects and teaching about their arts. I was set up with my Bayeux Tapestry inspired piece.  I only had one student for learning embroidery, but many people stopped by to talk about both my piece and the Bayeux Tapestry in general.

I discussed different aspects with different people, but there were some common points:

  • My piece is the same approximate height as the original, per information in most of the descriptive books about the Bayeux Tapestry;
  • my motifs are the same approximate size as those on the original, thanks to the fact that the David Wilson book provides information about their reproduction percentage (photocopy motifs in that book at 185% for approximate actual size;
  • the woman in my design is actually larger than the woman she is taken from...all three women in the original Bayeux Tapestry are smaller than the men around them.  I am modern enough that that was not going to happen.
Here I am working on the piece.  Because of all the talk time (which was great), I didn't get a lot of stitching done, but some did get done.  (Later I also worked on my double running basket cover and did get a fair amount of that done, I expect it to be in the "done" column soon). 


Sunday, February 16, 2014

A quick post.

This weekend I had the opportunity to do some teaching at an event in the Boston area.  I taught Introduction to Applique and Bayeux Stitch Embroidery.

A modified version of the Applique  handout is available at my website (see link to the right), and the Bayeux one will be put up there next week. 

The applique class was full (10 students) and everyone walked out with a needlebook well started.  The Bayeux class was about half full, and I think everyone got to play at least a little bit with each of the stitches.  I really need to re-think how I teach that class (again), to try to get everyone to the point of comfort with all the elements.  I found myself wishing I had the full time (hour and a half) with each person individually.

I firmly believe that studying historic needlework, and doing work based on that study are important, but teaching is also important.  It is not enough that we learn by studying and by doing, but we need to share what we have learned. 


The samples from my class
Below are some photos of students' work.  The class had 10 students, but as often happens, we ran right to the end of our hour, so I did not get photos of everyone's work in progress.


  One student provided these photos of her completed needlebook.  The "E" for the reverse side was her own design.